


 Categories
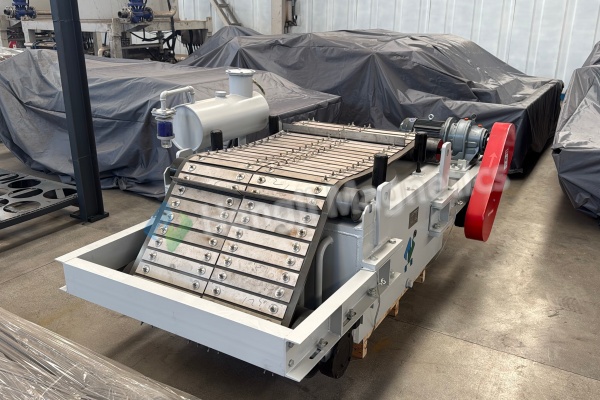
In power plants, mines, steel mills, and cement plants, belt conveyors are the arteries of production. Hidden within coal, ore, and aggregate streams, tramp iron acts like a silent threat—capable of tearing expensive conveyor belts and destroying crushers and mills. A properly selected and installed overbelt magnetic separator is the first line of defense. But how do you ensure your magnetic separator machine delivers maximum protection? This guide covers the critical installation and selection points to help you deploy this equipment effectively.
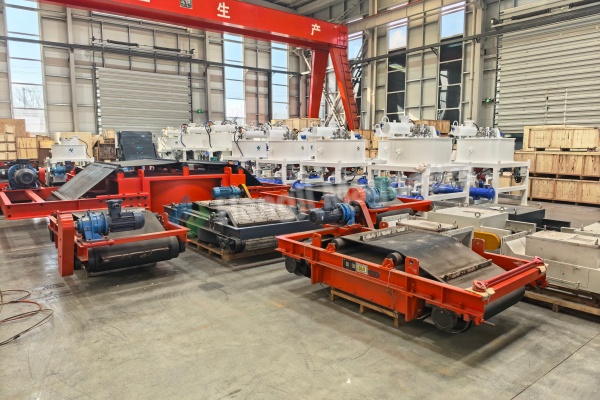
Two Core Installation Configurations for Your Overbelt Magnetic Separator
Based on multiple equipment manuals, the installation of an overbelt magnetic separator depends on its position relative to the conveyor and the material trajectory.
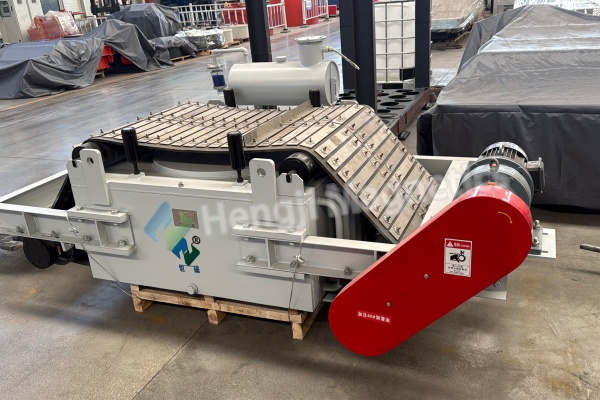
Inclined Installation (QX Mounting)
This is the classic configuration for the head pulley (discharge end) of a belt conveyor. The magnetic separator machine is mounted at an angle to match the material trajectory.
-
Best Location: Conveyor head pulley, where material is discharged.
-
How It Works: As material leaves the belt in a parabolic arc, tramp iron is briefly lifted. The powerful overbelt magnetic separator captures it during this exposed moment.
-
Position Adjustment Based on Belt Speed:
-
Belt speed above 2 m/s: Mount the magnetic separator machine slightly further from the head pulley to take advantage of the material trajectory.
-
Belt speed below 2 m/s: Mount closer to the head pulley to capture iron before it drops.
-
-
Critical Dimension: The distance (H) between the magnetic centerline of the overbelt magnetic separator and the head pulley centerline is key. A reliable starting point is H equals the pulley radius. Fine-tune based on material moisture, density, and belt speed.
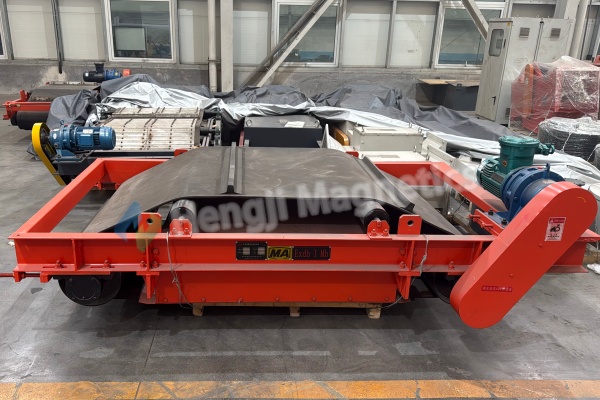
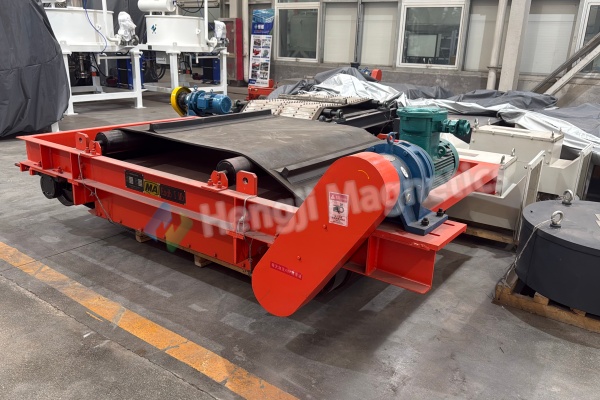
Horizontal Installation (SP Mounting)
This configuration is used when the magnetic separator machine is suspended over the middle of the conveyor, over a vibrating screen, or over a picking station.
-
Best Location: Mid-conveyor, where the belt is flat and material is evenly distributed.
-
How It Works: The discharge belt of the overbelt magnetic separator runs perpendicular to the main conveyor, scraping captured iron sideways into a collection bin.
-
Critical Requirement: The magnetic centerline of the magnetic separator machine must be exactly aligned with the conveyor belt centerline. Misalignment creates dead zones where tramp iron can pass.
-
Non-Magnetic Idlers: Install non-magnetic (stainless steel or ceramic) idlers directly beneath the overbelt magnetic separator to prevent the field from attracting standard steel rollers, which causes wear and reduces magnetic efficiency.
Three Suspension Methods for Your Magnetic Separator Machine
 Whether you choose inclined or horizontal installation, three suspension methods accommodate different building structures.
Fixed Rod Suspension (Type A)
Four rigid steel rods connect the overbelt magnetic separator to fixed anchors overhead. Simple, rigid, and low cost. Best for permanent installations where the magnetic separator machine does not need to move.
Chain Suspension with Trolley (Type B)
The overbelt magnetic separator hangs from a trolley on a monorail or twin-rail beam using four chains. Allows the unit to be moved aside for maintenance on the conveyor below.
Wire Rope Suspension with Trolley (Type C)
Similar to Type B but using wire ropes and cable clamps instead of chains. Offers flexible adjustment and is suitable for specific building structures.
Selection Tip: If your magnetic separator machine needs to service multiple conveyors or requires clear access for maintenance, choose Types B or C with traveling trolleys.
Installation Details That Determine Success
Electrical Check First: Before mounting the overbelt magnetic separator, verify the insulation resistance of the coil and the drive motor. Confirm all electrical systems are sound.
Gearbox Attitude: Install the gearbox as level as possible. If an incline is unavoidable, keep it under 12 degrees with the output shaft end facing downward. Exceeding this angle requires a specialized lubrication design to prevent leaks and bearing failure.
Control Panel Environment: The control cabinet for your magnetic separator machine must be installed in a dry, ventilated area. Outdoor installations require a weather cover.
Safety Red Line: An energized overbelt magnetic separator generates an extremely powerful magnetic field. Keep watches, instruments, and ferrous tools at a safe distance. Loose steel objects can become dangerous projectiles.
 Trial Run and Adjustment
-
Sequential Startup: Energize the drive motor first. Run for 30-60 minutes to verify mechanical operation. Then energize the overbelt magnetic separator coil.
-
Baseline Data: Record operating current and voltage during the trial run. These become reference values for future maintenance.
-
Belt Tracking Correction: If the discharge belt drifts, adjust the tail pulley first. Move the side the belt is running toward. For fine adjustments, shift the roller on the drifting side forward in the belt travel direction. Do not over-tighten the belt.
-
Energy Saving Option: For applications with low tramp iron content, add a metal detector. The magnetic separator machine operates only when metal is detected, saving significant energy. A switch allows return to continuous mode if the detector fails.
Maintenance for Long-Term Reliability
-
Daily: Remove dust buildup around the overbelt magnetic separator. Grease bearings per the schedule.
-
Periodic: Inspect the discharge belt and power cables for wear. Replace damaged components immediately.
-
Electrical Caution: Only qualified personnel should open the control cabinet. If replacing cables, use identical specifications and ensure all connections are dry and secure.


